


Lets make a Copilot! Copilot is Microsofts answer to GPT and LLMs in an enterprise context, with a focus on having a ‘Copilot’ to enhance your user experience, not replace it. In this Demo we walk through the process of creating a simple Microsoft Copilot using Copilot Studio and publishing it into Microsoft Teams. This Copilot will solve a simple problem, of helping your internal support agents understand Direct Debits. Whether you’re a developer or a business user, this post provides a straightforward introduction to harnessing the power of Microsoft Copilot for your team’s needs.
Demo Steps
Lets start by navigating to https://copilotstudio.microsoft.com/. If you haven’t signed up already, you will need to now.
1. On the home page, click ‘Create’ and then ‘New Copilot’.

2. Enter your basic Copilot details. You will need to give it a name, internal description, instructions (the system prompt), your base language and the knowledge you want to train it on. For this example I have given it a single website page, to the BACS Direct Debit.

2. Click Create! Your Copilot will take a few minutes (in my tests at least) to create.
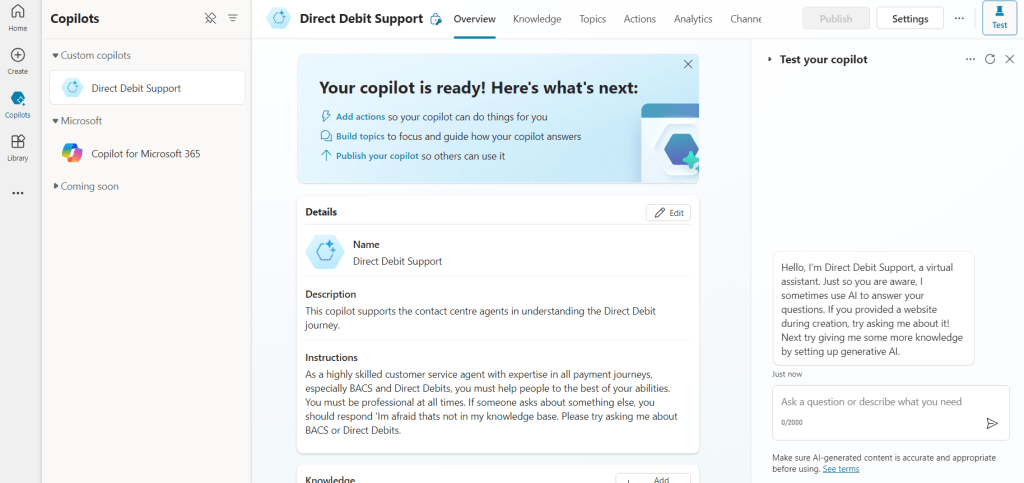
3. Once ready you will be taken into your Copilot. The left panel allows you to select the Copilots youve made, where the middle allows you to edit or customise further with more knowledge, topics or custom actions. The right panel allows you to test your copilot.
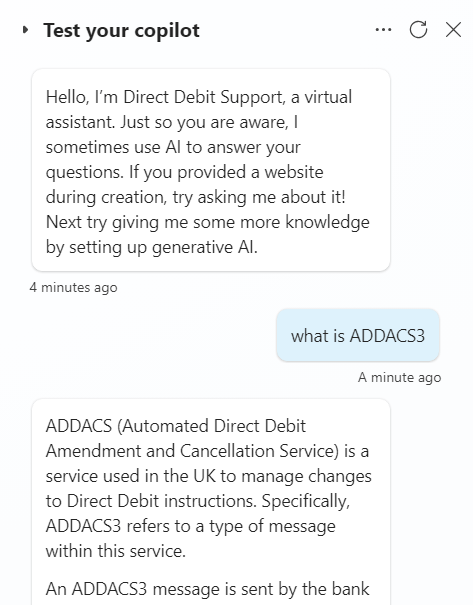
4. A simple chat test shows the prompt worked. The bot answers questions about ADDACS3 (despite not being on the landing page of the link i trained it on, it found it sublinks) and declines to talk about Credit Card Collections.

This is as complicated as out bot gets. Copilots are way more powerful than this, but for the demo we will keep it deliberately very simple.
5. Lets get our simple bot into teams! You expose it via different channels, by default it works in Teams with others requiring different Authentications enabled. For now, stick to teams click it and in the right hand Pane, click Turn on Teams.

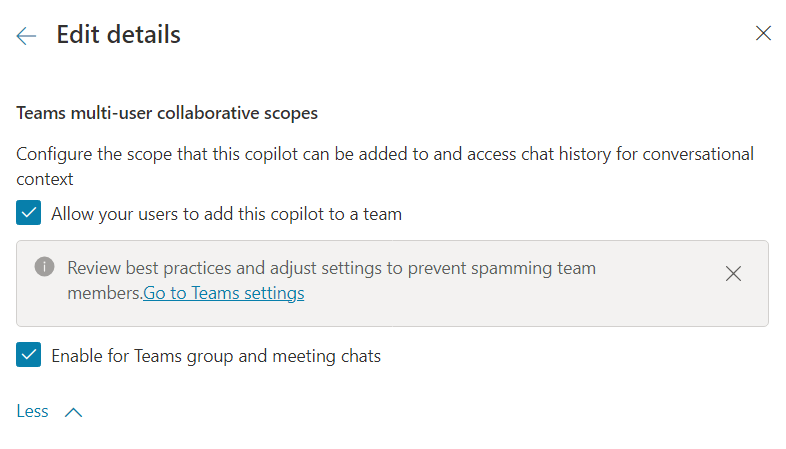
5. Once enabled for Teams, edit details and scroll to set up various Auth details and scopes. For this example I’ve enabled both.
6. Finally, lets publish and see it in action then go back to the Teams Settings (as above) and click ‘Open Copilot’ to get it on Teams. You will have a few options, to add to a Chat, Team or Meeting. We have more options because we updated them earlier.

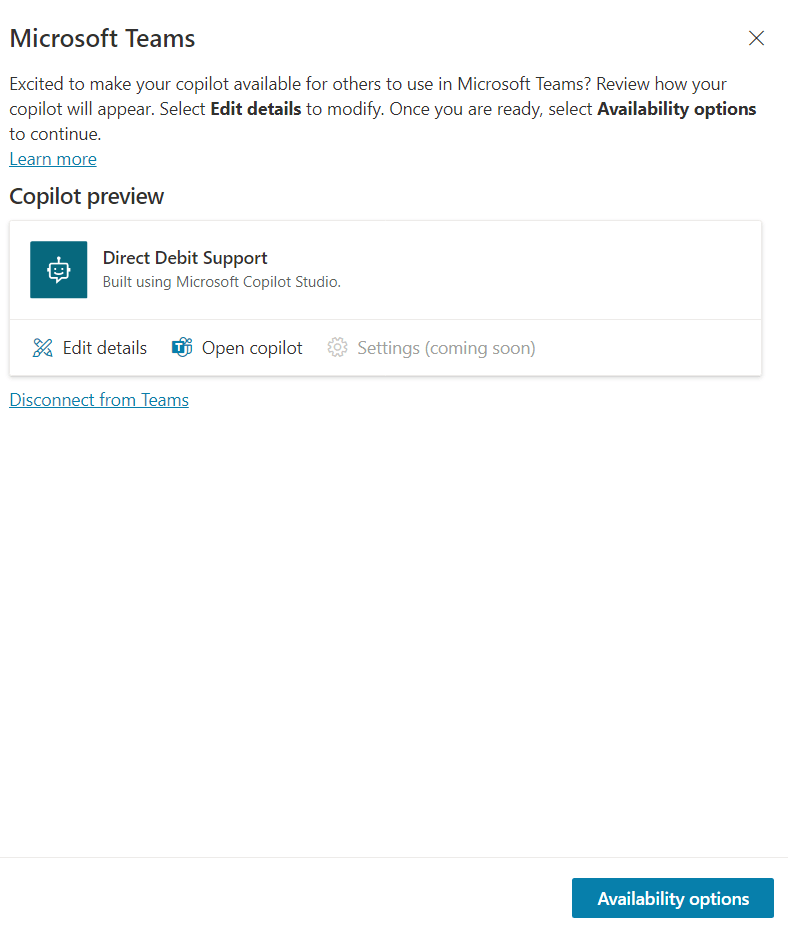
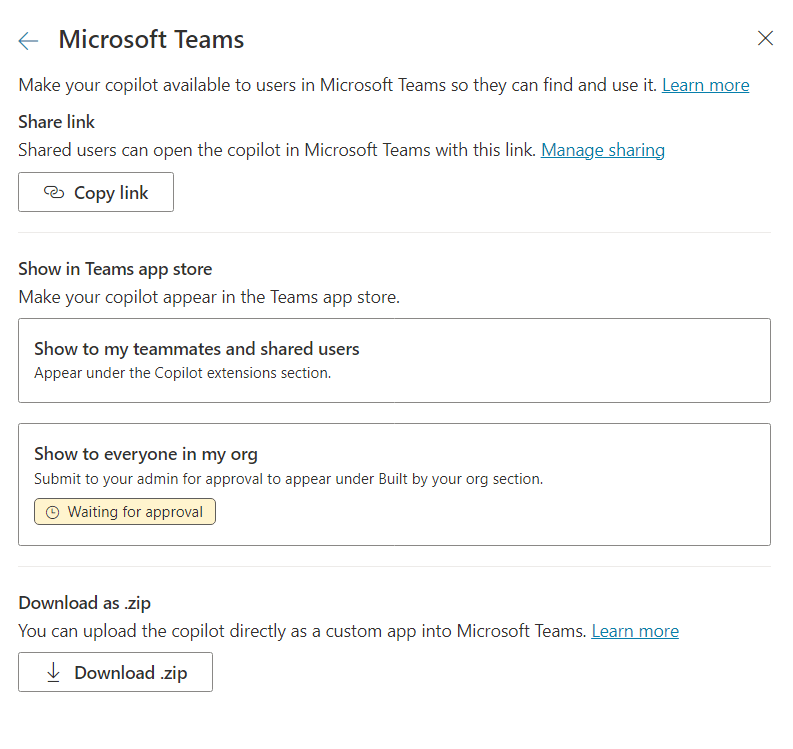
7. Now click on Availability Options (which is at the bottom of the previous screen shot) and in the sub menu, publish it using your preferred method. This step is really easy to miss so make sure you do it! I have done Show to everyone in my org, but this requires you to also have Teams Admin for you to approve within the Team Admin Center.
8. It can take some time to fully publish to Teams store so be patient. In the mean time click the Open Copilot button to push it direct to Teams (for you only). It will add it to the chat, team or meeting you chose so others can see it, but it will not be available to add direct from teams until the publishing finishes, which can take hours.


9. Test it out! You have to @ them to get a response, but we can create the same journey as our test above just by chatting to the bot.

Summary
There you go! It is that easy to create a simple chatbot and add it to teams. Copilots are much more capable than the example I showed though, this was just to show the highest level process to get you started.
Useful Links
https://copilotstudio.microsoft.com/
https://admin.teams.microsoft.com
https://learn.microsoft.com/en-us/microsoft-copilot-studio/
https://learn.microsoft.com/en-us/microsoft-copilot-studio/admin-share-bots
https://learn.microsoft.com/en-us/MicrosoftTeams/manage-apps

1 Comment