


Hello and great to have you back. In this blog post, we will take a look at the basic steps to deploy our Azure Function using Visual Studio from my last blog post – Azure Functions: Demo 1 – A scaffolded example . Once again, we will be using the in-built scaffolding so no coding required for this one but some experience of Visual Studio, c# and a knowledge of the Azure Portal wouldn’t hurt.
Note: if you’ve used Azure Publish Profiles before, you can probably stop now. The great thing is that it’s pretty much the same for Web Apps, as it is for Function Apps! If you are new to this whole Azure malarkey though, read on.
Creating an Azure Function in the Azure Portal
In order to publish an Azure Function, you have to have an Azure Function set up on the Azure Portal. Well, you can do it from within Visual Studio, but I prefer to set things up in the portal directly so that I know exactly what gets set up.
So, head on over to the Azure Portal and either log in or create a new account, whatever is good for you. Azure always tends to have some attractive free credit options for new accounts, which is a great way for new users to get started and explore the (endless) limits of Azure. As mentioned on my last post, Azure Functions actually come with a grant, which allows pretty much free usage for developers of the functions themselves, so even if you aren’t a new user, you should be able to run this tutorial pretty much free.
Once you’ve logged in, click on ‘Create a Resource’ over in the top left and then type ‘Function’ into the search bar to get your results. You should see a ‘Function App’ as an option at this point so go ahead and select it.
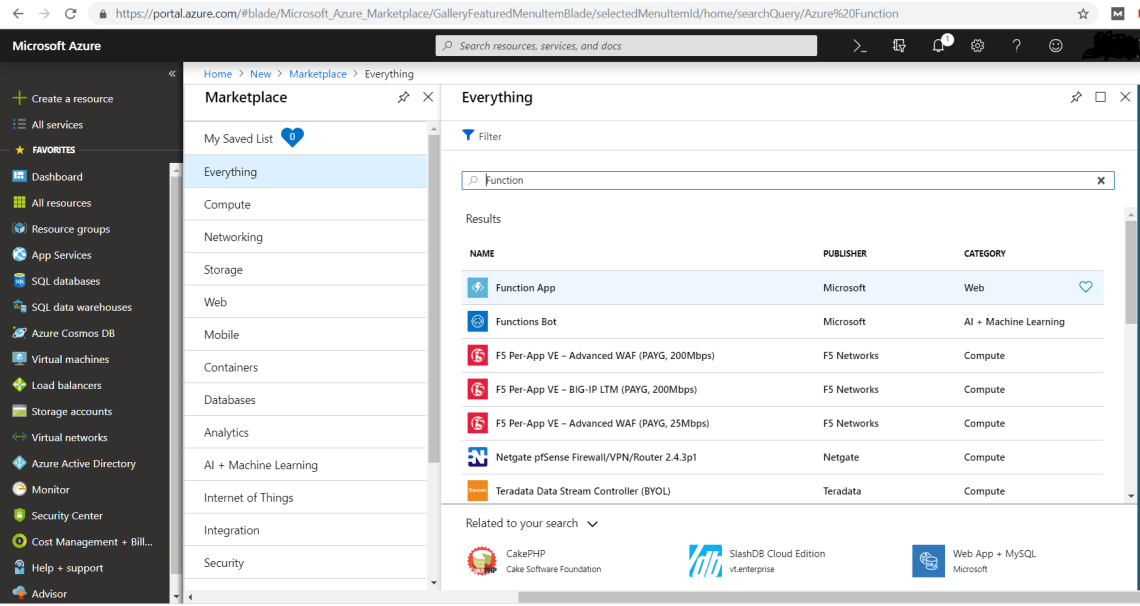
This will open a new blade, with a description of the service you selected and a create button. Go ahead and select create.
Note: if you’ve not used Azure before, a blade is just what we call a new dialog/ window/content. Azure has a distinct side-scrolling effect, where every new layer of the application is in a new ‘blade’ that appears to the right. This just represents the rabbit hole you’re getting yourself into.
This gives you a new blade with inputs to set up your new Function App.
Configure your new Azure Function App
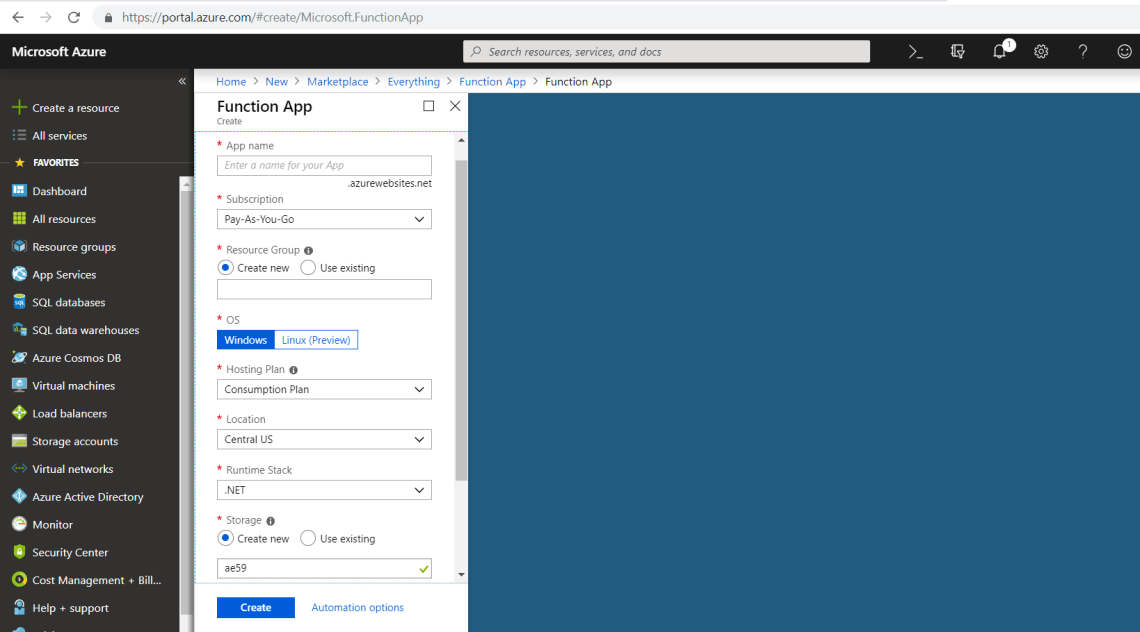
App Name: This has to be unique within the azurewebsites.net namespace as ultimately it forms its endpoint on the internet. (i.e. you can enter ‘appname’.azurewebsites.net to access it).
Subscription: If you are just experimenting, this is likely Pay-As-You-Go, but if you are lucky enough to have something like an MSDN subscription covering your fees, you can reference it here.
Resource Group: Personally, I tend to create new resource groups for every project so that I easily delete it once I’m done. Alternatively, you can use an existing resource group, for example, if you want to group together a bunch of Function Apps and keep your billing consistent.
O/S: Most of us are probably coding in c#, so Windows is the most sensible, but as Function Apps support Javascript and Python, Linux is an option too.
Hosting Plan: Again, for demo purposes, you will likely want to use the consumption plan for its free monthly grant, but you can also link it to an App Service Plan if you wanted to link it to your website.
Location: set this to your closest geographic equivalent.
Runtime stack: again, most of us will be using c# (as per the demo) but if you wanted to use javascript, you’d set it here.
Storage: This is either blob, table storage etc that your files are stored against. Select new, for ease of use. NOTE: this is not included in the monthly grant, so is considered a billable resource. It won’t be a lot (pence likely) if you delete immediately after running your test.
Application Insights: this is a great way of collecting additional information about your Function App, but does require you to share this information with Microsoft in order to collect it. Select yes or no depending on your preference and if yes, then select your closet geographic location.
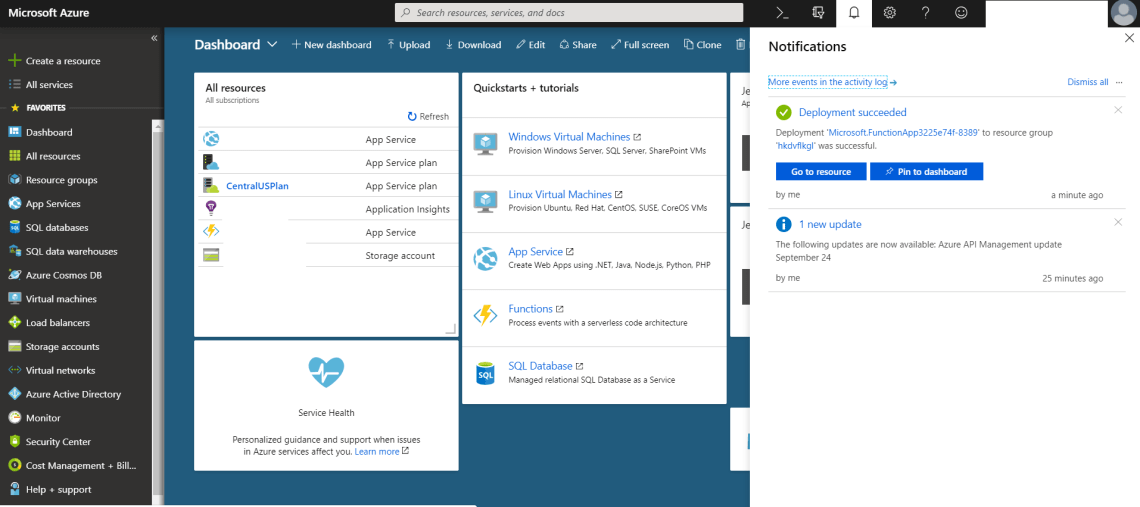
It will take a minute to create, so be patient. When it’s done, click the notification bell in the top right nav and select ‘go to resource’. This is where Azure really makes a name for itself as easy to deploy.

There are several key features here, from configuring proxies to stop/restart and platform features for configuring CORS, but the one we are interested in is ‘Get Publish Profile’. This is basically a text file with all the required information in it to publish our Visual Studio Function App to Azure. Cool right?
So head back to Visual Studio, right click on the project in the solution explorer and click ‘Open in Explorer’. This opens your document folder so that you can paste your newly downloaded publish profile into the project. Once you’ve got this, you can select ‘Show all files’ as indicated in the picture below. This small icon is at the top of your solution explorer. Once you’ve clicked it, you can then right-click on the publish profile (which should now appear in the Solution Explorer) and include in the project.

Now is the really fun but. Go to Build in the navigation and then select ‘Publish (your solution name)’. This gives you a new Publish window with option ‘Start’, so click this. Then a new window will open with the option to ‘Import Profile’ at the bottom right. Click it and then use the file explorer that opens to navigate to your publish profile and select that.

And technically, that’s it. Visual Studio will start the publish process for you and within a few moments, you will see the output window to confirm that you publish has been successful. You can now navigate to the URL you defined when you created when you set up your function app in Azure (ie appname.azurewebsites.net) and you can access your function in the exactly the same way as in the previous demo.
Summary
So that’s it. In two demos, we went through both how to set up the scaffolded Function example and how to deploy it to Azure. Super easy right? From here, your imagination is pretty much the limit, as you no longer need to be able to provision your own servers, just write an Azure Function, host it in Azure and call it when you need it. I look forward to seeing what you make from it!

2 Comments