


If you’re coming from a web development angle to Azure, there’s a good chance your first questions are around setting up a website and how much it’s going to cost. There is some good news and bad news here depending on the type of site you’re looking for as it is super easy, but it can be a bit pricey for small low traffic sites.
Static Content Website Hosting
If your site is a simple static website, like a Single Page Javascript App (SPA) then you can actually do a really cool trick, where you host your site in a storage container and use a CDN to serve that site as a secure site. I won’t be covering it here yet as this article is focused on enabling sites with server side code, but the MS documentation here will give you a jump start.
Setting Up an App Service Plan
If you have any requirement to run Server Side code, then you will need whats called an App Service plan.
Note: This will allow you to run sites that need server side code, but they do not include any kind of back end database. If you need SQL or Cosmos, you can provision this seperately but it will incur additional costs. Alternatively if you want WordPress you can select the ‘WordPress’ resource to have Azure provision the required resources for you.
First off, we need to understand the different between an app service and an app service plan. An App Service Plan you can basically think of as an IIS server that you provision and you can host as many App Services in it as you want. The App Service Plans start from free and ramp up quite quickly depending on the extra features you add.
To set it up, login to the Azure Portal and click ‘New Resource’, search ‘App Service Plan’ and click ‘Create’.

Note: creating an app service will automatically include an App Service Plan if you don’t select an existing one. This guide does the steps separately so that you can see them clearly.
The basic information to set up the plan is fairly familiar, select your subscription (payment plan), resource group (link here if needed), give the plan a meaningful name, select your operating system and where you want region you want the plan hosted in.
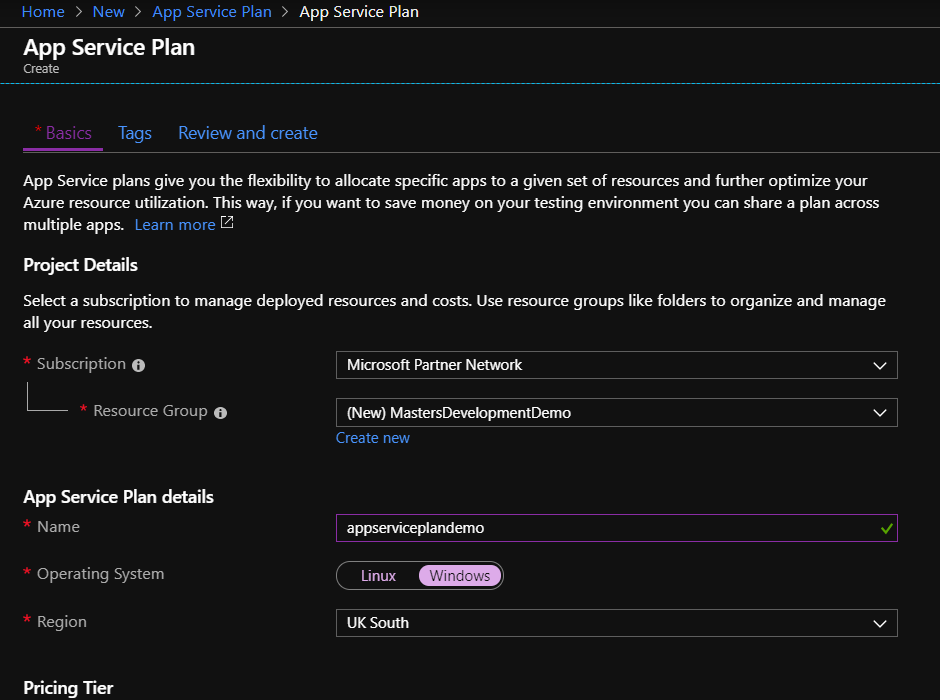
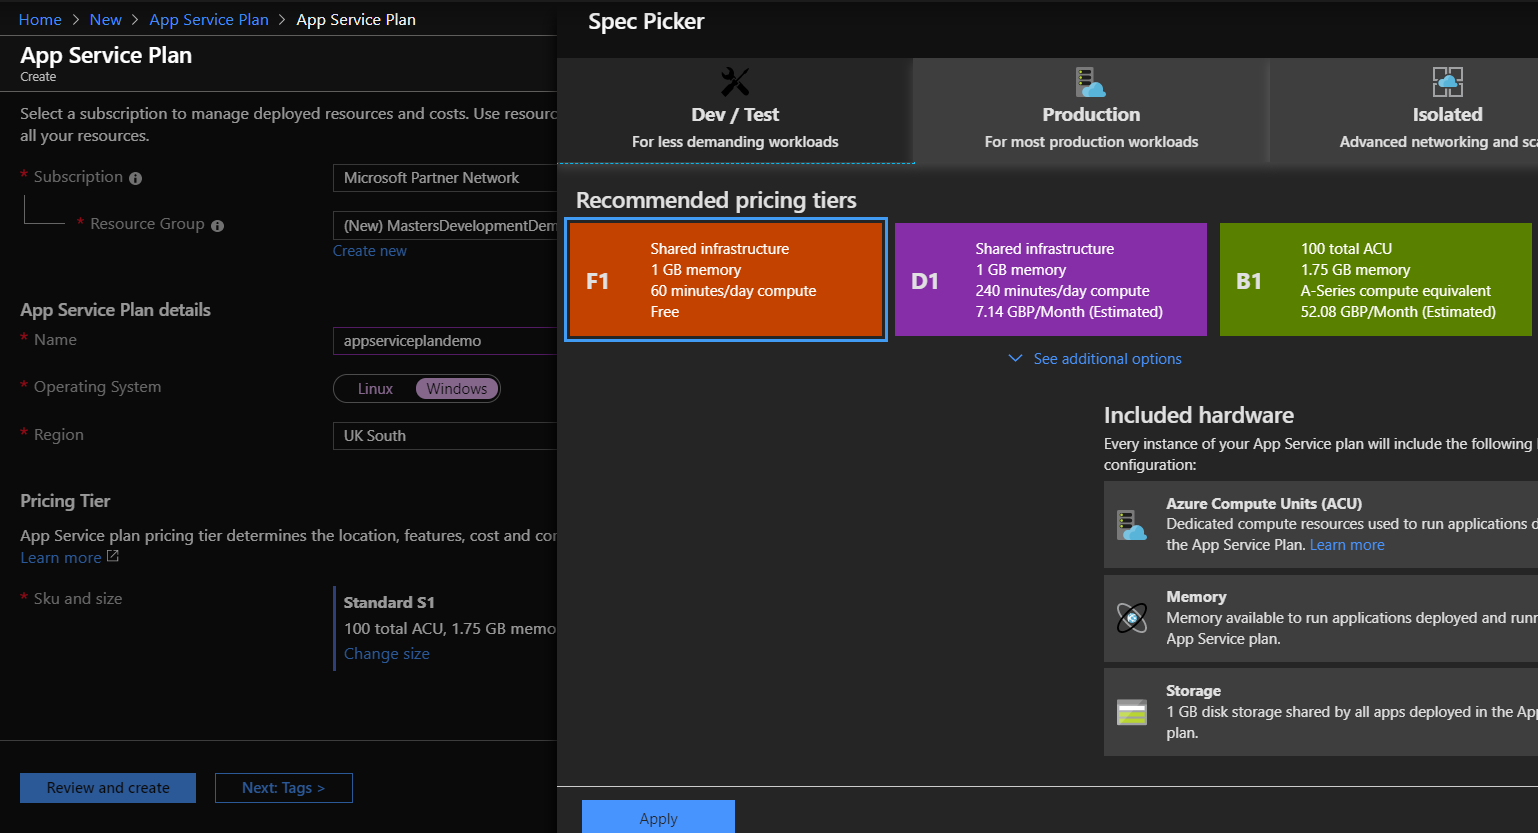
The pricing tier is a worth a little bit more detail though, as it defaults to S1, which is the basic production tier. Chances are, you are looking at a demo here and will want to change this to a development tier F1.
- Free Tier (F1): basic learning and experimenting (very limited compute)
- Shared (D1): basic apps, low traffic
- Basic (B1): development and testing of production apps
- Standard (S1): production apps (built in traffic manager)
- Premium (P1, P2, P3): production scale apps with significant traffic and resource requirements
As you might expect, the cost for these ramps up quickly, with F1 being free, D1 £7.14 per month, B1 £52.08 per month and so on. Note these prices are estimates for UK South in 08/2019 and will change.
As will all resources, you can tag them if you want on the next screen and the final page allows you to review your selections and download an automation template if you want. When you’re ready click the blue button ‘Create’.
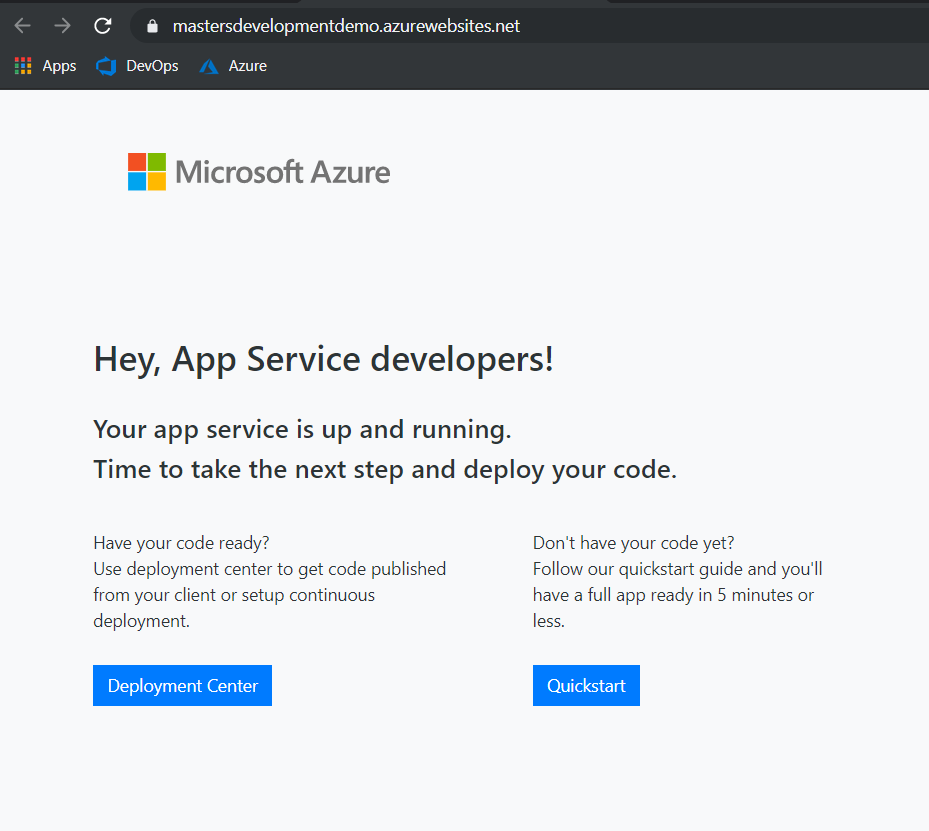
Once deployed, you can go to the resource to see that you have an app service, that has nothing in it. A quick note at this point, if you deployed an S1, even though you have nothing in here, it will be costing you. You have provisioned resource and even if you are not using it, Microsoft will charge you. From this screen the left hand menu contains an option for Scale Up, but this also lets you scale Down if you need to. It basically just means that you can change the tier after deployment if you need to.
Note: if you are using a higher tier and its features (like custom dns) you will not be able to downgrade without removing it first.

The other fun thing here is ‘Scale Out’. We can’t do this on F1, but it basically allows you to spin up multiple instances of your app service (using performance rules), all serving the same content and use Traffic Manager to automatically push users to the fastest app service. Pretty cool right? Another, note though, each instance will cost the same, so if you had a D1 with three instances, its 3 x £7.14!
Adding an App Service to Azure
An App Service can host a few different things (or combination of), including Function Apps, Web Apps and Web Apps for Containers if you want to deploy using Docker or similar.
Using the same initial steps, from the main menu select ‘New Resource’ and type in Web App.
From here, select your subscription and resource group to match when you created the App Service Plan and give the instance a universally unique name.
The publish method we will use is Code, and the Operation System is fixed to match the run time you selected on the App Service Plan, in this case Windows. The Run-time stack should match whatever code you’re planning to deploy to here. Finally, select a Region that is suitable for you.

The App Service Plan again should match the plan you set up previously.
The next few screen will allow you to add Monitoring (App Insights), tag your resources and finally review and download your template if you want. Voila, click Create and in a few seconds you have a site, accessible from the url you defined as the name in instance details.
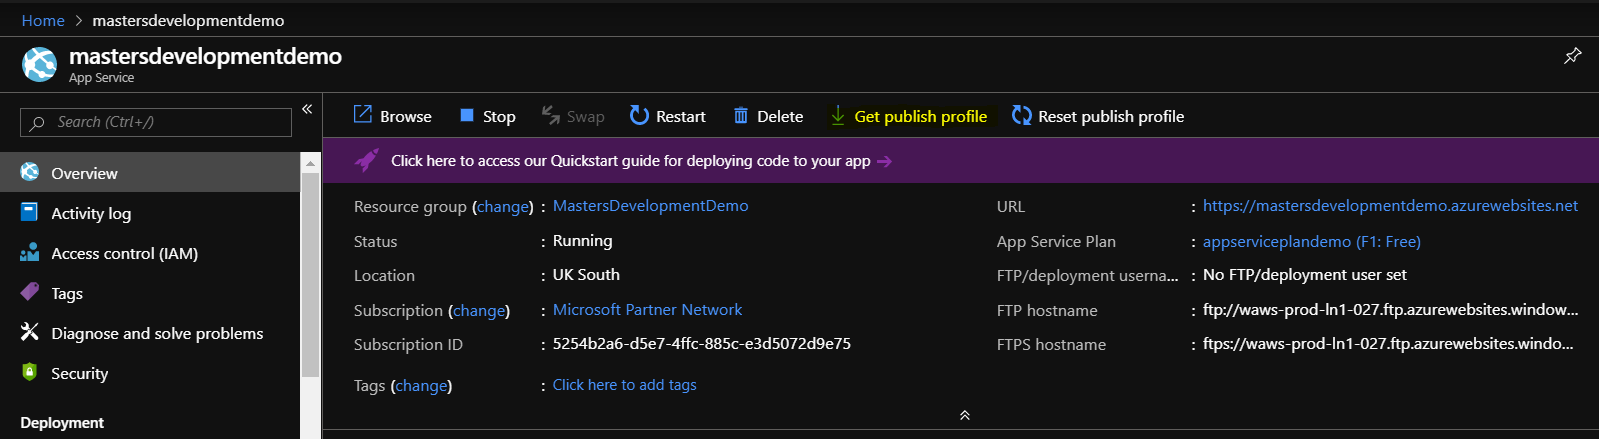
If you navigate to your Web App in Azure, you can click on ‘Get Publish Profile’ to get a file that you can add to your VS project and have your code deployed to Azure.
Summary
An App Service Plan can be used to host multiple Web Apps or Function Apps and share the cost. This makes them great when you need to deploy multiple sites for the same client, or want to control costs by sharing the compute resource between them.
Next article we will look at setting up Azure DevOps and pushing a basic site up using CI/CD pipes.
Have fun coding.

1 Comment