

In this article, we will look at the steps to set up source control in your projects using Azure DevOps and Visual Studio. For this demo, you’ll need Visual Studio installed and a web browser to access DevOps. This assumes you are comfortable setting up projects in Visual Studio and have a basic knowledge of Git.
The guide follows on from ‘How do i set up a website in Azure?‘ so check that out if you haven’t already.
Setting up the Project in DevOps
So to kick off, head over to Azure DevOps and either sign up or sign in if you already have an account. If you don’t have an account yet, sign up! It’s a great service (and required for this demo) and Microsoft gives you unlimited free private repos alongside all the goodies of DevOps.
From the landing page, you will see your organisations in the left-hand column. You will be able to join as many organisations as you like so you can work for multiple companies at the same time (great for freelancers). Select your organisations just by clicking on them and your projects for this organisation will show in the centre of the screen. In the top right you will see a ‘New Project’ button to start a new one.

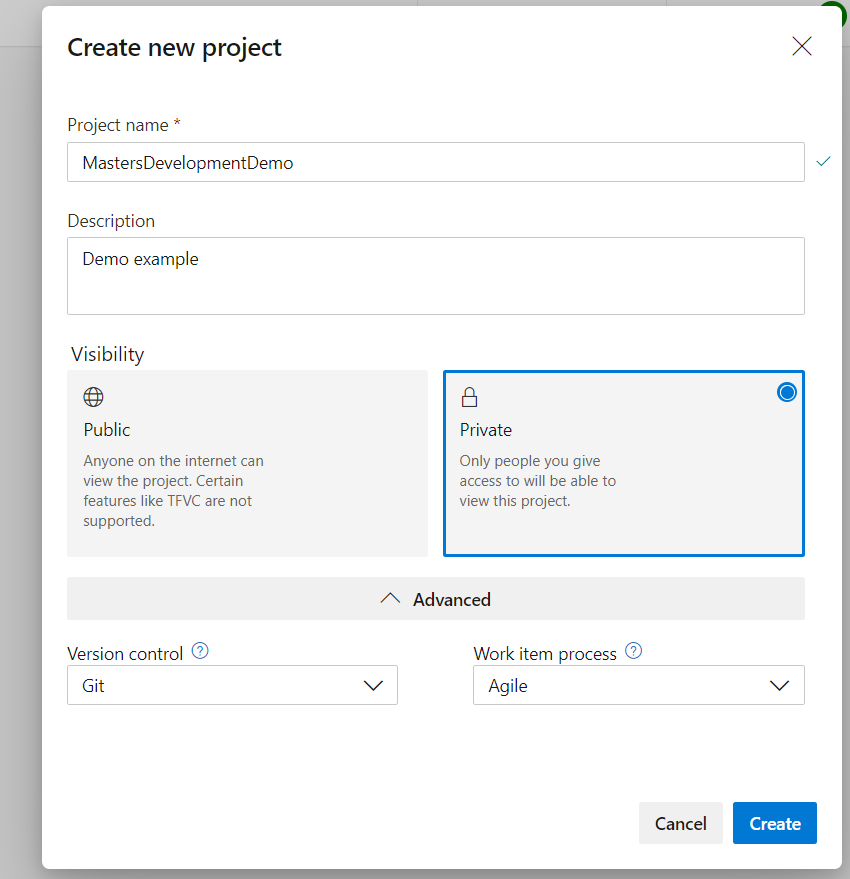
You’ll need to give your project a name and good practice dictates a meaningful description! I’ve opted for Private, but Public source control gives you more freebies in DevOps later if you are going to go open source (DevOps is a great choice for an open source project due to increased build agents/minutes.)
Under Advanced you will get the option to change the source control type, from Git to Microsofts’ Team Foundation Version Control as well as the Work Item Process from things like Agile or Scrum. In this demo,I’ve opted for Git and Agile, but you can choose what suits you.
Linking a Project to DevOps
There’s alot we can do in DevOps and for a quick flavour, read my older post but for now, go back to Visual Studio and open the Team Explorer, then Connect.
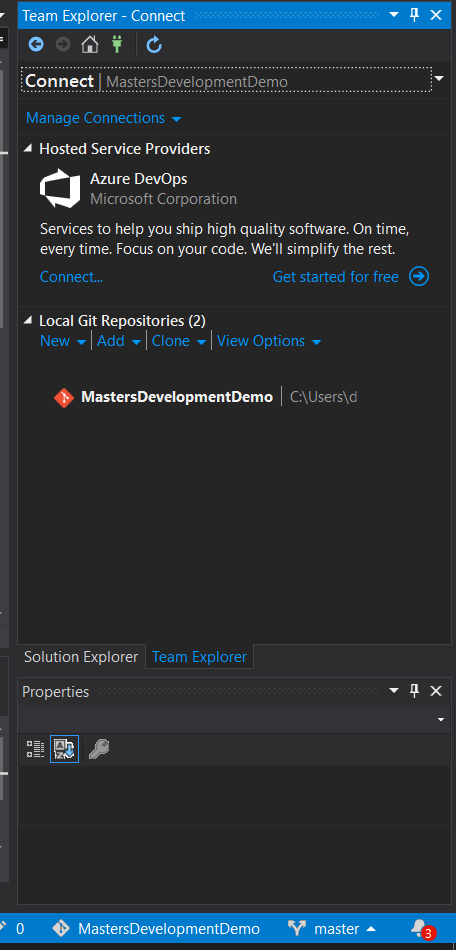
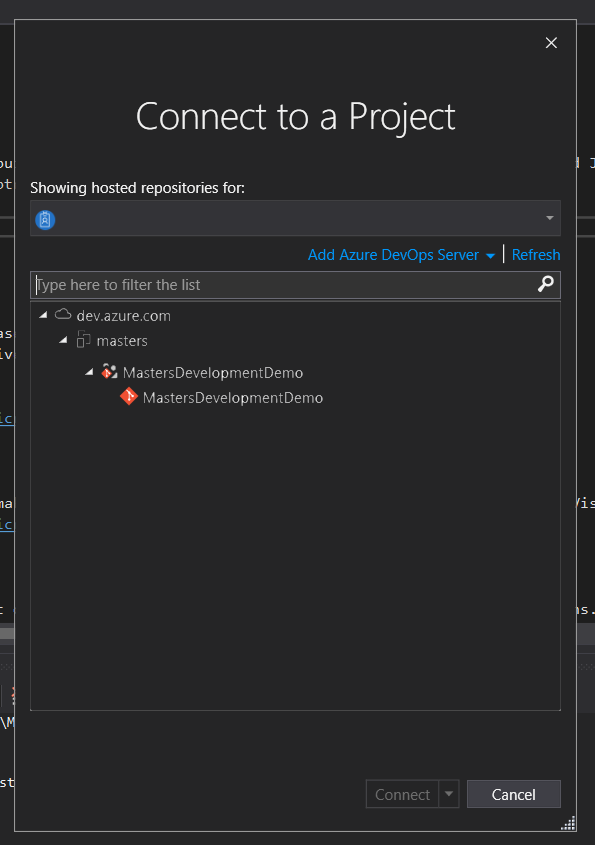
Select your repo that you just created in Azure DevOps and Connect. This clones the repo, which is currently empty to your local machine and you can now click the blue text to ‘Create a new project or Solution’.

Create a simple .Net Framework application running MVC and tweak the View/Home/Index to identify that it is yours. I just altered the heading to ‘Hello World’.
Note: In the adding new Project dialog, there is an option to add to a create new solution or the existing. We want it in the existing solution as this is what our repo is mapped to on our local machine.


Click on the 99* to create a commit for the addition of the files to your local repo. Then on the 1 Commit Icon to push it to your repo. If you’re not familiar with Git, let me know and i will write some stuff up on it in future.
Note: if you have random sqlite files you may need to add these to your gitignore. This usually means you’ve not used Git before on this machine and haven’t got a global ignore file configured.
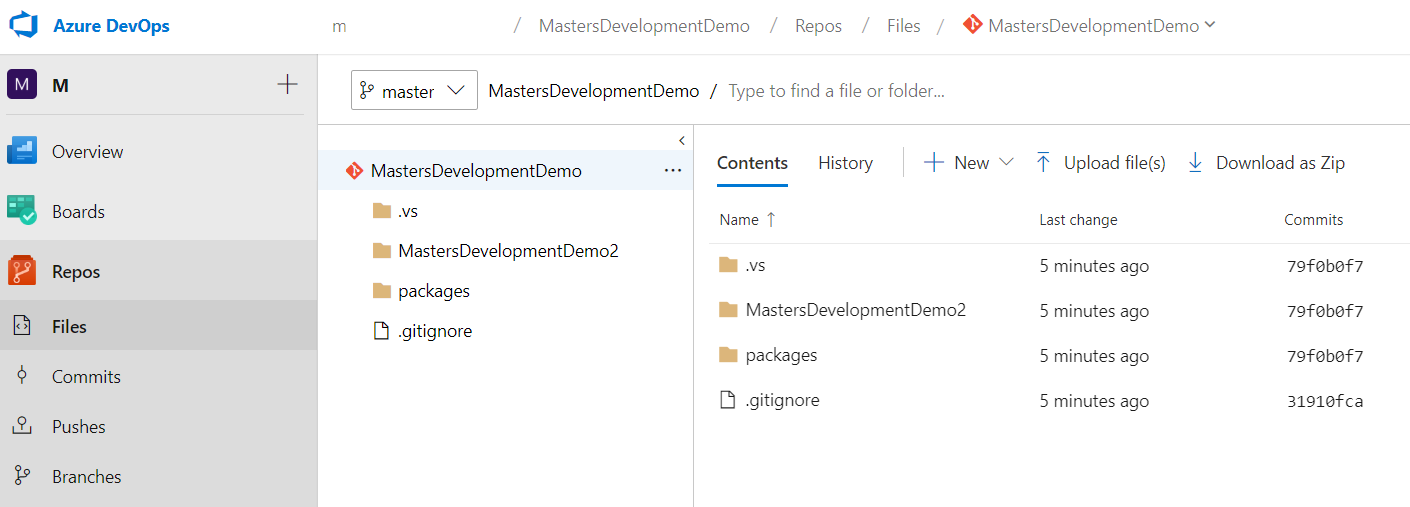
That is all you need to get your code committed to your Azure DevOps source control, so head over to Azure DevOps, Repos, Files and see your work in action!
Create an Azure DevOps build pipe
Setting up CI/CD is surprisingly easy but for now we will start with CI (Continuous Intergration).
In Azure Devops, click on Pipelines then Builds and New to create a New build pipeline. You’ll want to select Azure Repos Git (YAML) as this is the most flexible means moving forward, but if you just want to mess about, scroll to the bottom and select the link to use the classic editor. This is a great little gui that gets you going super fast without needing code.

Pick your repo from the list on the next page.

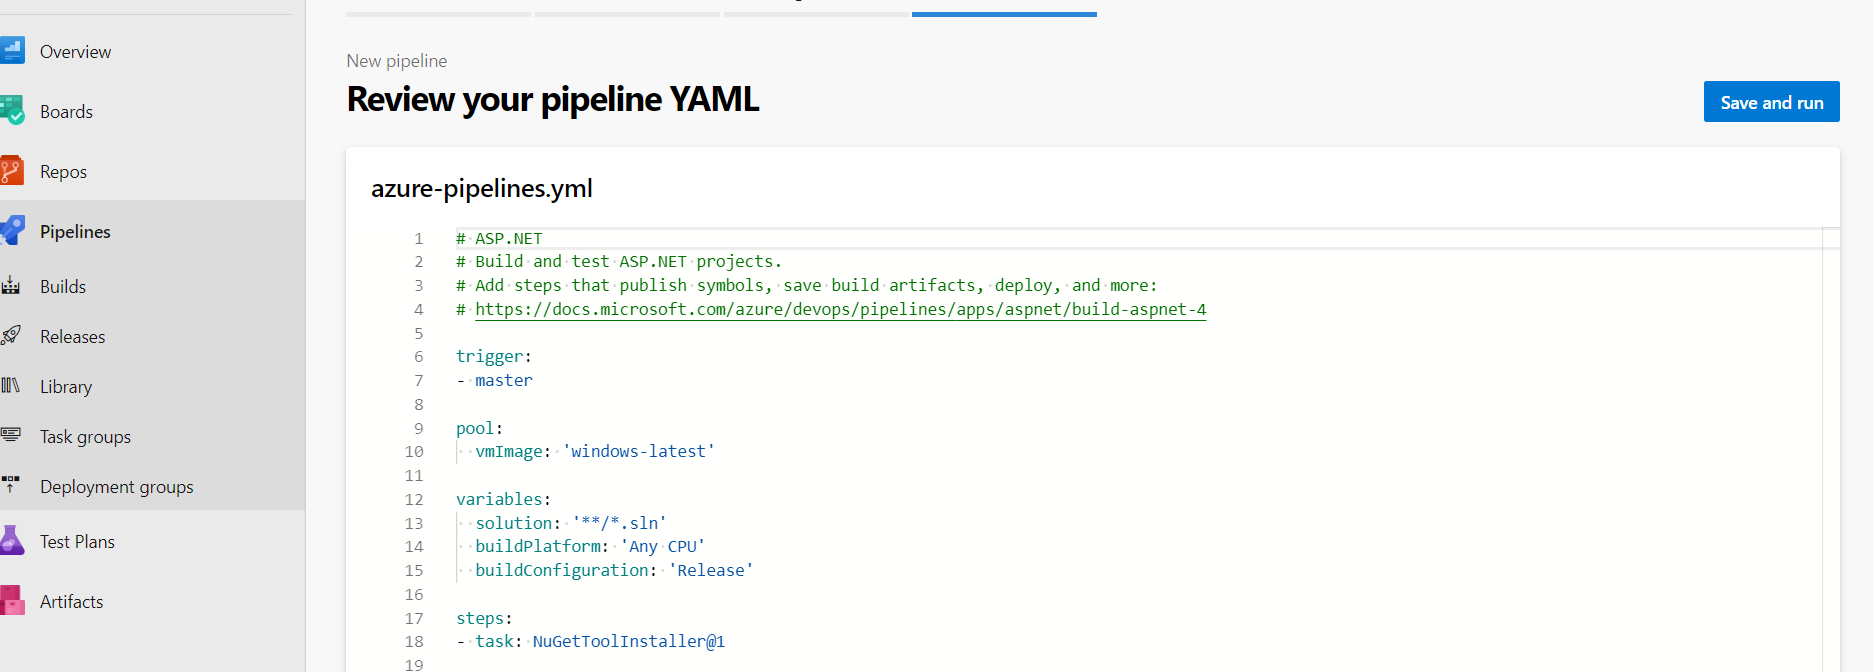
Select ASP.Net as a pipeline template.

Then review the YAML, you might notice that the default does not include a publish step, so scroll the bottom and click, this triggers a flyout pane that you can add search in for publish. Youll need to add the default publish step to the bottom to finish the pipe. Without this step, the code will build and then be immediately discarded because the pipe doesn’t know what to do with the result!
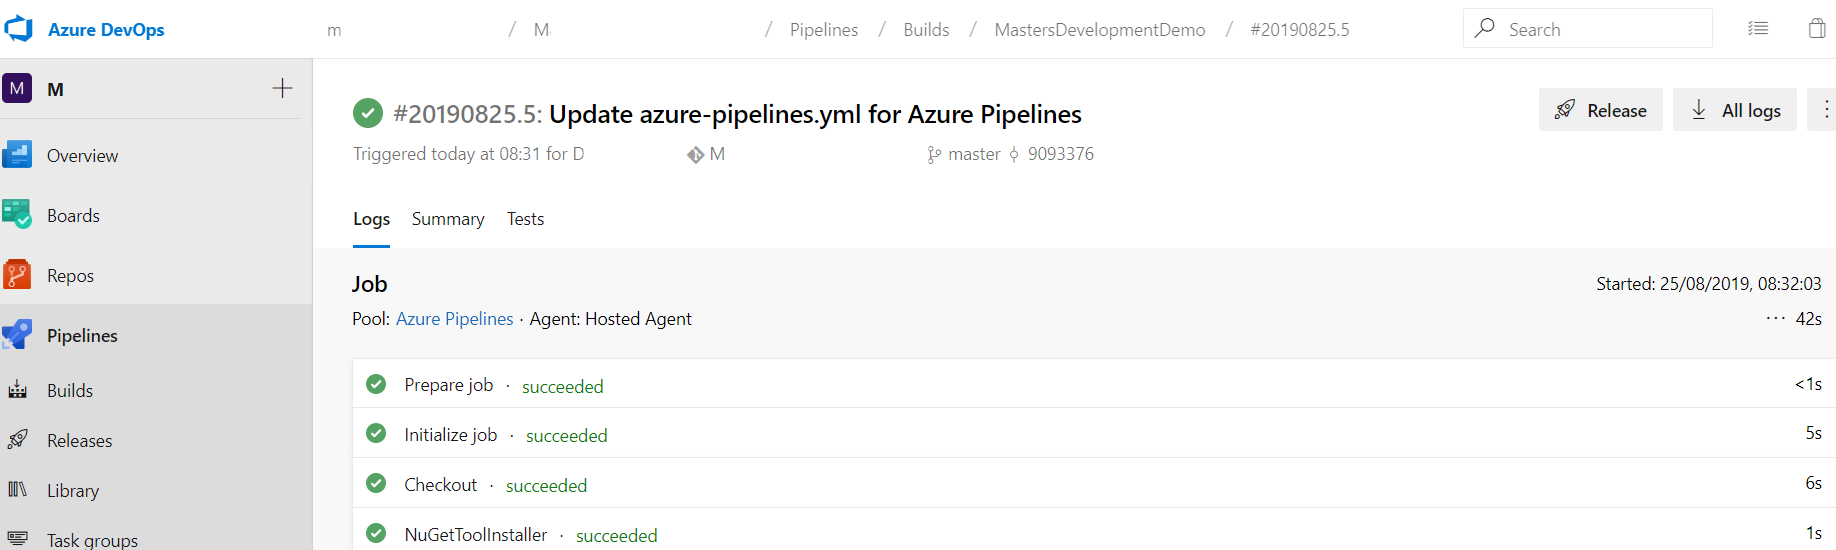
Click Save and run to see your work in action! If you get a warning about your solution not being found, check that you have a solutions file, (selecting add to solution in the step earlier could have missed this).
Release a website using DevOps CD
The easiest way to set up a quick release pipe for CD is to go to the build artifact you just created and click ‘Release’. This will automatically drop you in to a new Release Pipe and associate the artifact you just made
A quick note on Artifacts. An Artifact is just a fancy word for a releasable product. It is the result building your solution and preparing a ‘drop’ that can then be used by another pipe. The Release pipe then uses this pipe to push that drop out to somewhere. A build pipe only ever builds, and a release only ever releases so you need both for a full end to end CICD pipe.
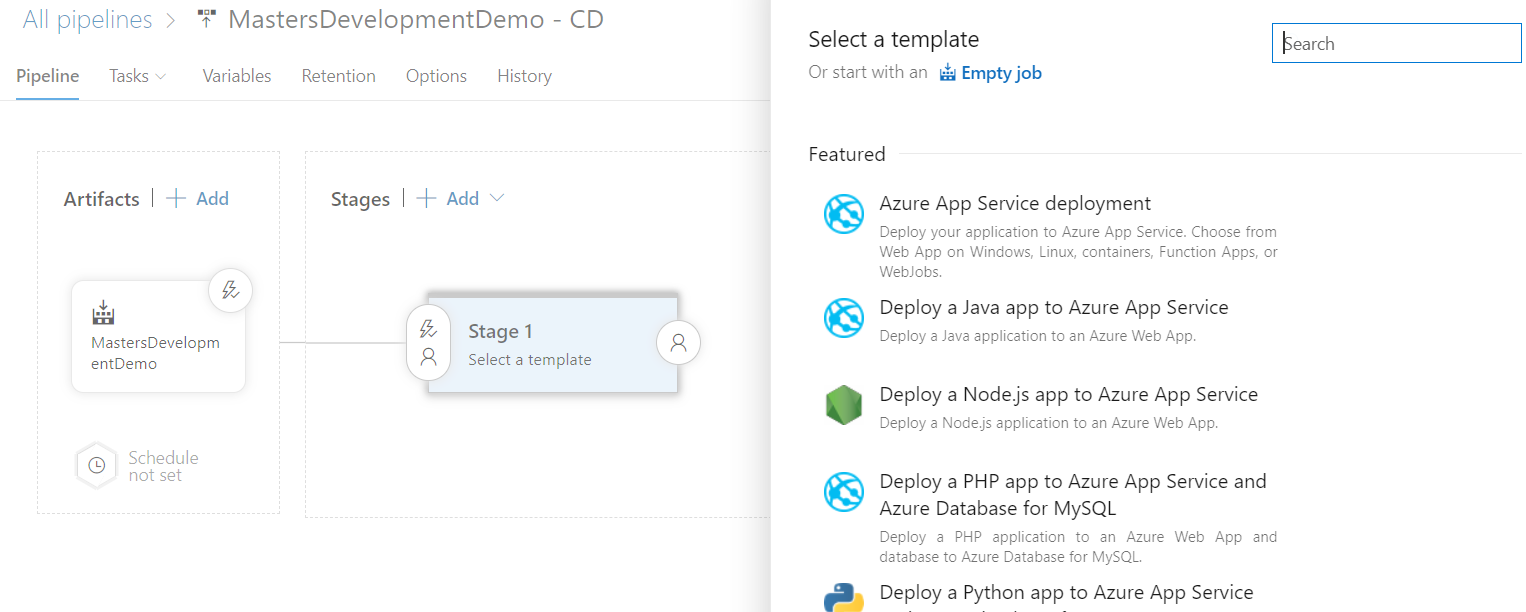
You’ll want to select ‘Azure App Service deployment’ for your Stage 1 template. You can have as many stages as you want and have what’s called ‘Release Gates’ between stages, which is a great way of pushing out the same build to multiple environments like Dev, Test etc whilst still maintaining control.
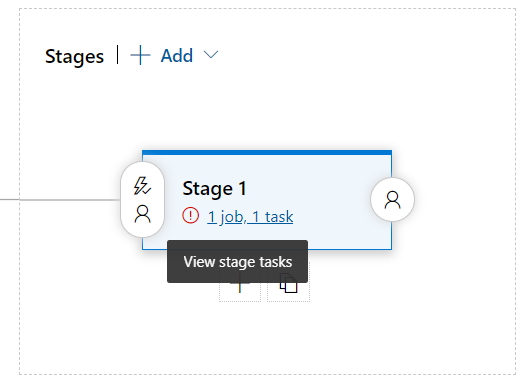
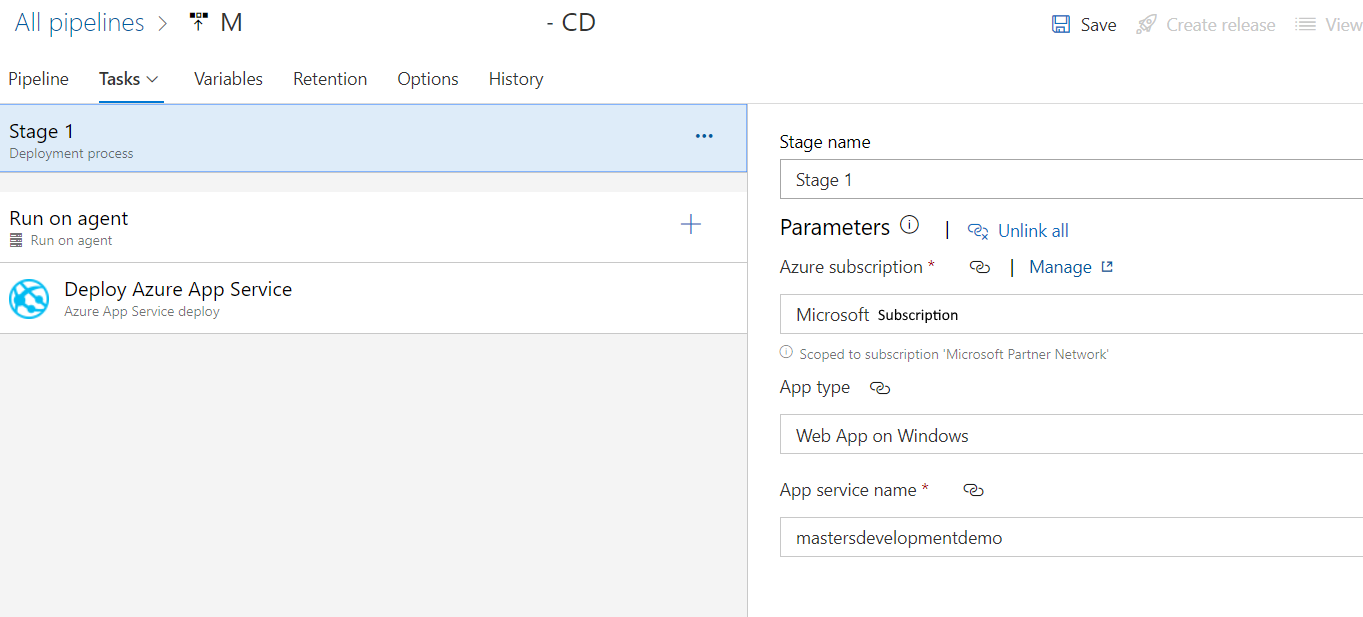
Once you’ve added it, you’ll need to view the stage tasks by clicking the hyper link to continue. This will load the release pipe view. On the left you have the stages and steps, and the right the configurable details. In Stage 1 you will need to add your details to your Azure subscription by signing in with your Azure account. Select App type of Web App on Windows and then your app service name should pre load with the app services you have available in that subscription.
This should enable the ‘Create Release’ button on the top. Click it and click Create on the flyout pane to release your site!


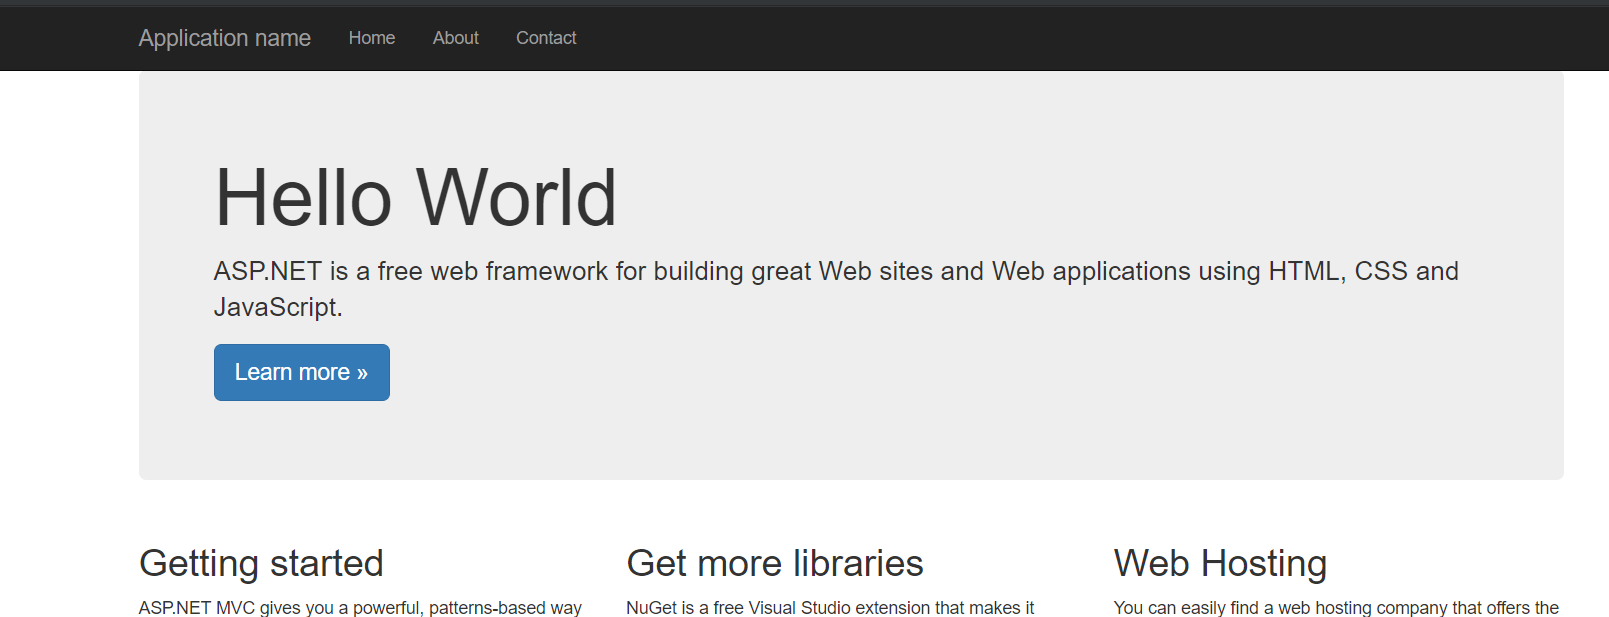
It will take a couple of minutes to deploy your site, but when you get that satisfy green tick, head over to the site as defined in your azure web app and voila! Note the hello world i added way back when!
Summary
There is a huge amount of stuff you can do with CI/CD in Azure and this barely scratches the surface. This walk through should have given you an insight into the possibilities though and set you up with a basic CI/CD pipe for your website!
